Showing posts with label diy nail art. Show all posts

Monday, August 11, 2014

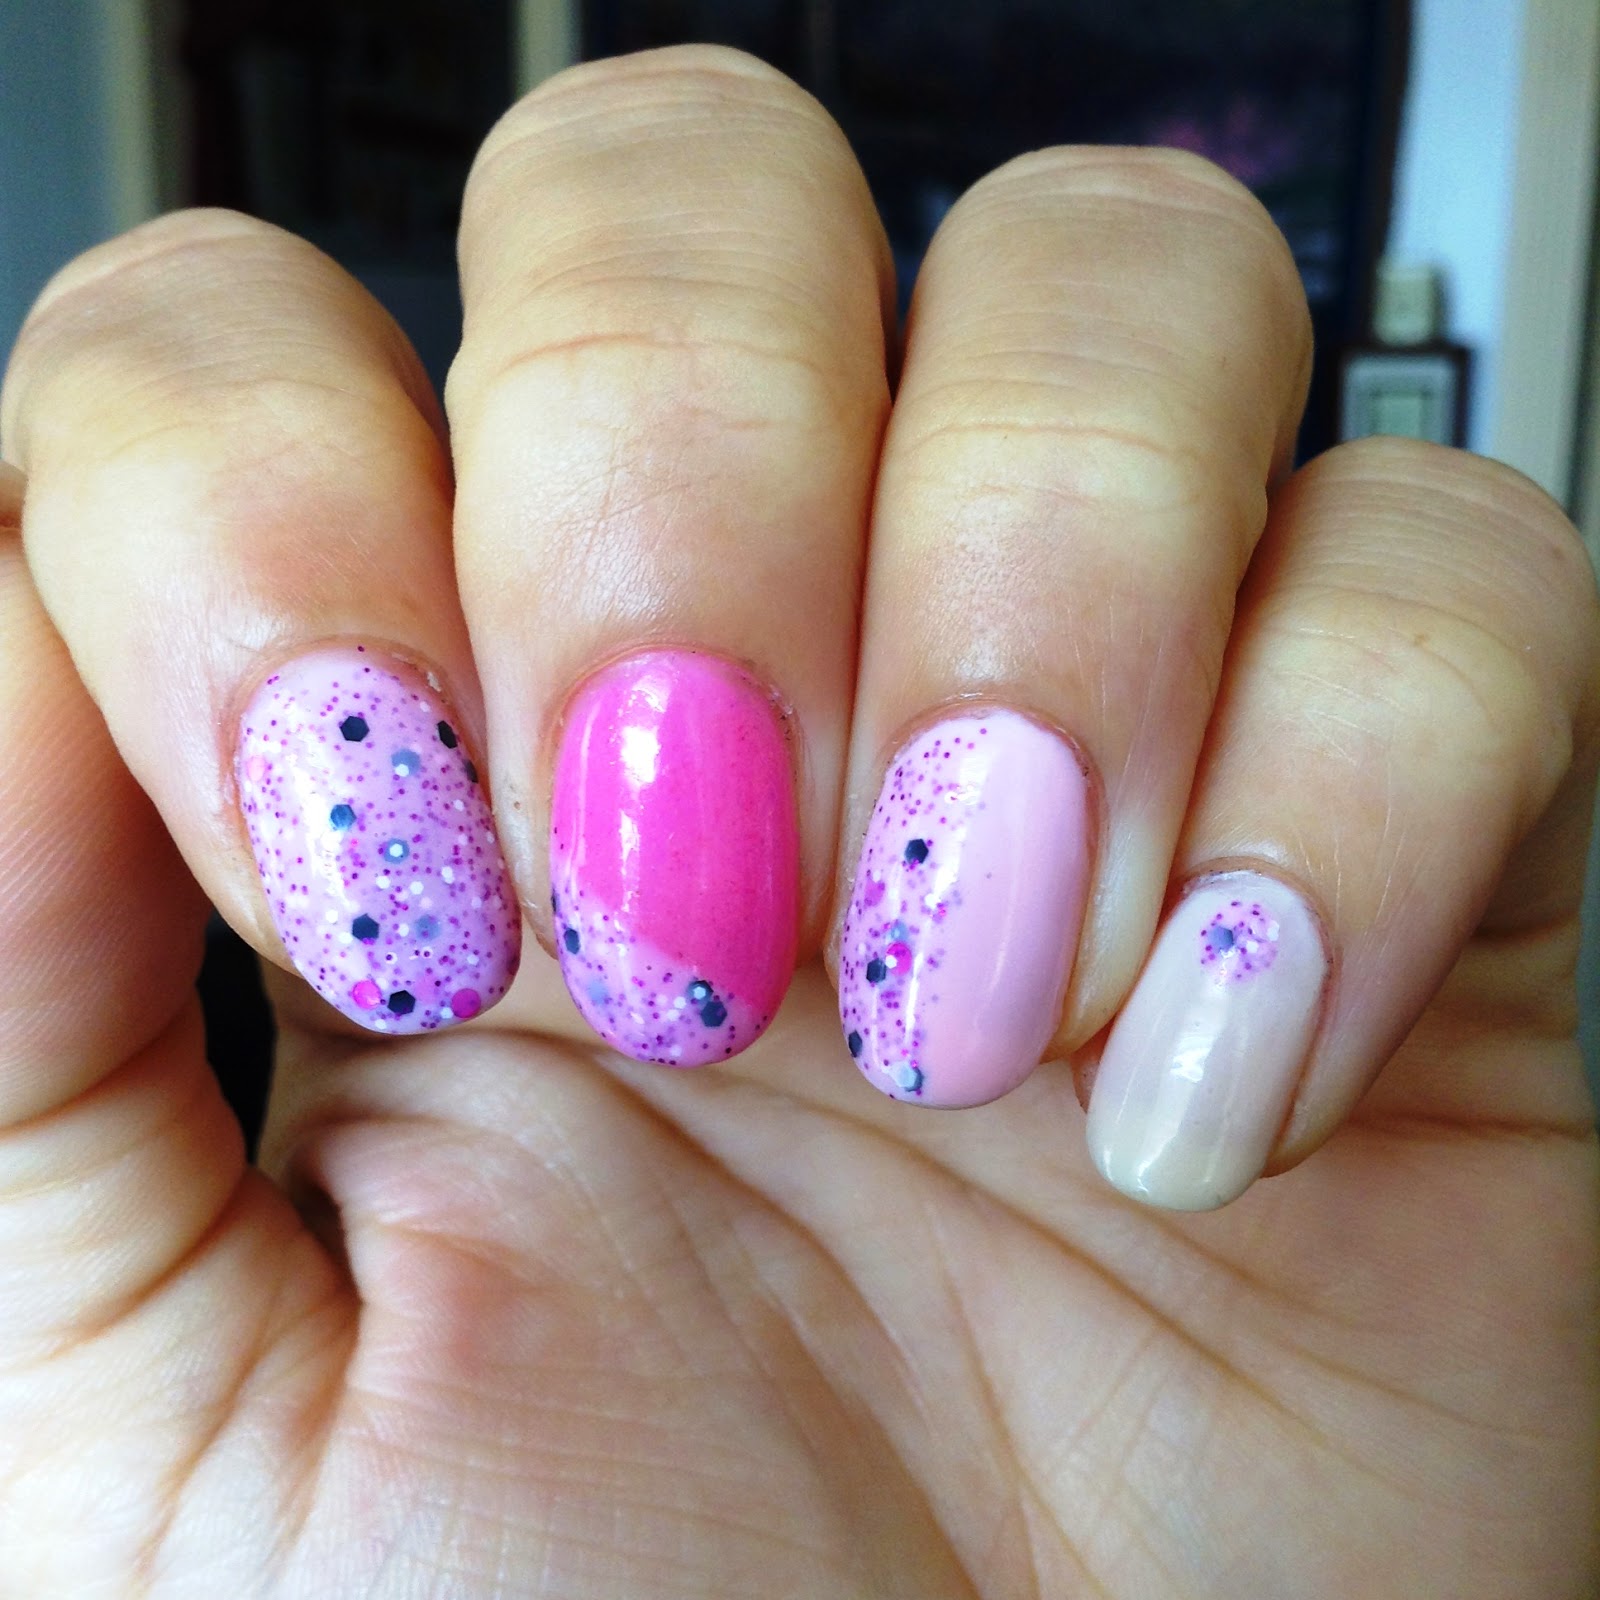
Day 63: Pink Nail designs - indie polish - pink manicure

TODAYS ALL PINK! For those who faithfully follow my instagram, you will notice I have posted this many over a week ago. However, I feel it deserves a nice little slideshow all its own. So here it is. ENJOY.
cream polish on pink is: Sally hansen complete manicure in: almondine
The baby pink on ring finger is Sally hansen hard as nails in: hardcore party. 

You like? If you would like a list of all polishes and indies I used, comment please and let me know.

Until next time,"Have a grand day and dont forget to Glaze!"


update: Kathy asked and so here are the polishes used:
Pinky purple glitter indie on middle and pinky are: Smokey mountain lacquers in: "lets get pinky"
Pink on index finger is Rain City laquer: "smitten"
Black detail is just a striping brush polish
pearls are from ebay, i think. you can find them easily online.

ENJOY!!!! :) :) 


Monday, August 4, 2014

Day 61: Born Pretty Store - review on nail stuff

Hello Everyone! Todays post is about some items sent to me by born pretty store.

 These are the flower nail decal stickers. These stick very well and are perfect to spruce up a simple mani into something elegant,chic and girly. i LOVE, LOVE that the flower petals have raised feeling to them, like soft felt.
 A close up of the flowers. The whole sheet comes with 12 different squares of different flower patterns. With so many pretty flowers and styles to choose from, this IS A MUST HAVE for a manicure party or girls sleepover. Plenty of stickers to go around.
 These darling gold studded hexagon gems are AMAZING! They are perfect embellishments to add to any nail polish color, design or even used in arts and crafts. The gold tone is good quality and did not chip or wear while wearing them.
 They are teensy, which i LOVE, only 3mm diamater so their not too gaudy. Want a bold statement? Add more then one and instant spectator alert. YOU'LL LOVE THE attention and the quality of these adorable studs.
FULL VIEW of the 12 square sheet. Theirs over 250 STICKER DECALS HERE! Wowza!!!! You wont have to worry about running out. You can even cut the squares and share whole sheets with nail art buddies, families and friends.

Link to flower stickers HERE
Link to Hexagon studs HERE
Link to the bornprettystore HERE
Want a discount??
Use code: YESX31 and get 10% OFF your entire PURCHASE!

Wanna SEE how I used the studs and flower decals in my manicures? CLICK HERE


Saturday, May 17, 2014

Day 49: DIY Crayola Watercolor Nail art

Hello lovelies,
Today is a different kind of post. I have been dabbling in creativity and using different mediums in hopes to create different kinds of nail art and techniques. I saw somewhere on pinterest that a lady used her kids watercolor paints to create nail art. So you know i had to try this too. ;)~

I began hunting for the cheapest water color paint set i could find, while sticking to the Crayola brand, as i have loved that brand since a child. Nothing worked better than Crayola for me. Not Roseart, store brand, etc. I was an absolute Crayola fanatic as a child. Thinking back, i have always loved art and creating things. Any who, i remember having the big, almost briefcase looking, crayon holder. Anyone else have one of those as a kid? PLEASE do share if you have. This briefcase contraption looked very much like the one (i found via google) below.

So now as an adult, i traveled store to store in hopes to find Crayola water color paints. I ended up finding one for less than $2 bucks and then the following week, found another one for $1.49 while on a grocery run. Both i brought home with me.  :) :)

TECHNIQUES:
I have never worked with watercolor paints on the nails so i didnt have a technique to go off. SORRY folks. It was a trial and error kind of thing.


 The above picture is the watercolor paints and the different dots i played around with

FROM LEFT TO RIGHT:
Nail #1 was me using a dotting tool and dipping it in water color paints then dotting on the nail
Nail #2 was me using a cutip and lightly dabbing at the wet dots to soak up some colors (in attempts to try the bubble effect i see alot on instagram.....don't think it worked quite well. What do you think?)
Nail #3 After letting the water color dots dry for a few minutes, I again used the cutip and dabbed more of the watercolor off, to create a washout effect (kinda like this one alot....why? idk)

EACH nail was painted 2 coats of white polish and let to dry BEFORE attempting water color on them. This is a MUST unless you want a big smeary mess.

The picture above is some of my favorite designs using the Crayola water color paints. 

So, what do you guys think?Are you tempted to try watercolor nail art too?
Do you hate it?

Lemme know PLEASE :) :) 

Until next time,

"Have a grand day and dont forget to Glaze!"

Thursday, February 6, 2014

Day 42: A cosmetic haul from the Dollar Tree

Hello everyone! 
Today's post features a mini haul from my travels to the Dollar tree this past week. As you who read my blog know by now, i absolutely ADORE DOLLAR TREE and find some great hidden gems or name brand items for ONLY A BUCK! Who can beat that? 


Sunday, January 26, 2014

Day 39: Birthday Nails from Moi

Hello everyone,

Here is a very special post because its my BIRTHDAY!!! January 25th to be exact, I officially turned 26 years old.... Closer to 30 years old every day :/

Here is a pic of me and the most special person in my entire life, My Husband Adam and I.


 My special birthday cupcake nails!!! 

I created this look using:
1. Indie polish by Everybeauty Nail Lacquer
2. Konad cupcakes on stamping plate BM14
3. Dotting tools that i bought from Ebay
4. Nail Art Deco striping polishes from Dollar tree
5. and a variety of colors and wackiness, all my own :)

I hope you all enjoy. 

As always,.
Have a grand day and dont forget to GlaZe!

Thursday, January 9, 2014

Day 34: Julie Nail Polish Review - Matte Polish - Rite Aid Store

Hello Darlings! I told you I would have a FULL Reviw on these Thursday, and Thursday it is.

BACKGROUND: I was given this Julie polish by my sister who bought it but didnt realize it was matte polish, which she hates! But who's complaining, thats 1 more polish for me, right? :) :)
So i tried it on and was not wowed by it at all....at first anyways

PROS

*LONG LASTING: seriously the most surprising thing about this polish was how long it lasted. I applied this Julie polish without a top coat and 3 days later it was only BEGINNING to tip wear. This was after a very long 3 days of constant washing and my hands being soaked in water, detergents etc. This BABY had not a DROP of top coat and it still kept its staying POWER! Impressive, I'll say.
*AN ARRAY OF COLORS
*INEXPENSIVE: Im not sure how much my sister paid for it, but given her spending budget these days, I'd say it was no more than $2-3 bucks.

CONS

NOT REALLY MATTE: The polish dries to a slight matte but looks more like a wax finish. The kind of wax look that you see on candlesticks that have dried up wax drips on the side. In my opinion, it is not A TRUE MATTE.
Also, the matte finish wear off.

~If you apply lots of creams, oils, butters etc. to keep your hands in tip top shape, you will be DISAPPOINTED to see how within the same day, the Julie "matte" polish is no longer matte but glossy. :/

WHERES THE NAME? There is no name on the bottle! Like what? I looked ALL OVER the darn thing and was shocked to see that. There's ONLY one other polish brand that does that, LA Colors, and its so RIDICULOUS. Every polish has to have a name to tell what it is but this brand DOES NOT.

Imagine, someone likes your nails and ask what colors that, you say, " I DON'T KNOW." How are you gonna look? Like a dodo or like someone who buys such cheap polish, it doesn't have a name. lol. In any case, an embarrassing situation indeed.

 Julie "no name" polish with some embellishments on funky fingers polish in "jawbreaker"
 You see how shiny it is? That's definitely NOT matte
I applied a fresh coat on tips of index and pointer. Can you see how its more matte like then the polish on the pinky for example? For whatever reason, the matte look just doesnt last on these.

Instagram pic

Hope to hear from you all!!!

"Have a Grand day and don't forget to GlaZe!"

Tuesday, January 7, 2014

Day 33: Nail Art using China Glaze, Rimmel London and more! Alexis Posh

Hi all!!! Today i want to share you with you this lovely manicure, inspired by the recent giveaway I WON (so rare for me) from the China Glaze 2013 Collection. Besides the Gorgeous China Glaze polish, i was also itching to try the geometric stain glass kinda look I saw others use with nail striping stickers.

And thus, Alexis Posh was created. FYI I have this weird thing where I have to NAME my nail art. Not other peoples nail art because if I was 100% recreating something from another nail artist, I would definitely give credit. But nail art that is mine, that i created using techniques and my color inspirations and random doodles, i name.... I wonder what that says about me? Hmm. Anyhoo, the pictures are below.

ENJOY

 The China Glaze 2013 Christmas Collection that i WON! :) 


 Really happy with my first attempt at the Nail striping sticker technique!


So that is the Mani I have to share with you today. Hope you enjoy it. Please leave comment,thoughts, questions, below.

As always,

"Have a Grand day and dont forget to GlaZe!"